TestLink on Ubuntu22.04 with support by Fleximg
AWS-Marketplace
https://aws.amazon.com/marketplace/pp/prodview-kcaffq2wml4ya
Usage Instructions
1. Login to TestLink
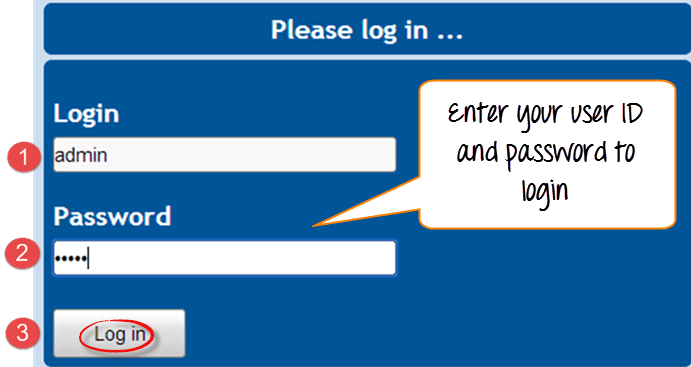
Step 1 : Open the Testlink home-page and enter the login details
http://{your-host-ip}/testlink
Enter the userID – admin
Enter the password - admin
Click on the login tab
2. Creating a Test Project
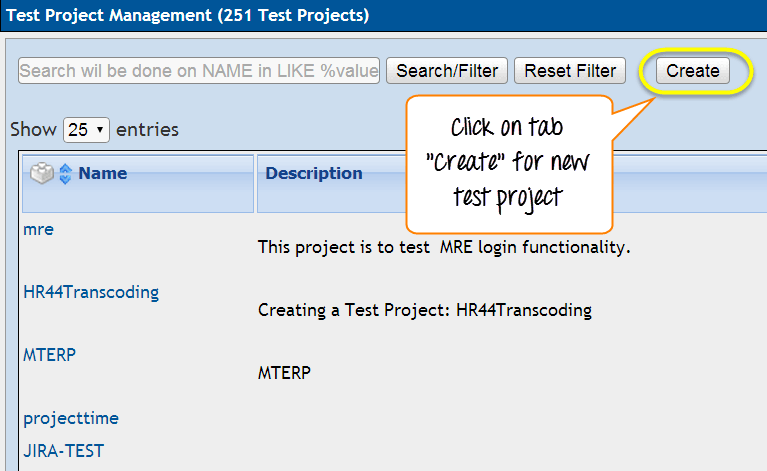
Step 1: In the main window click on Test Project Management, it will open another window

Step 2: Click on the tab “create” to create a new project.
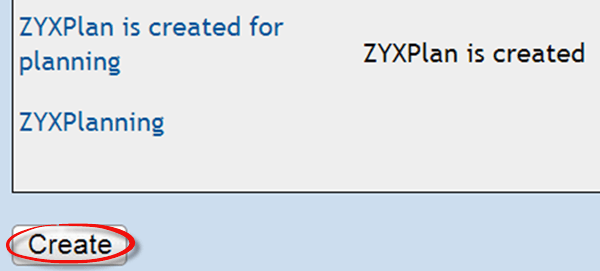
Step 3: Enter all the required fields in the window like a category for a test project,
name of the project, prefix, description, etc. After filling all necessary details,
click on tab “Create” at the end of the window.
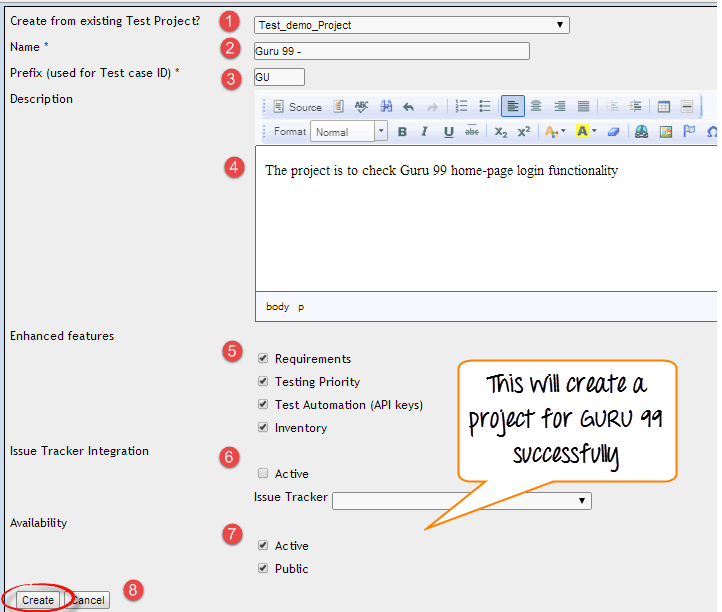
This will create your project “Guru99” successfully.

3. Creating a Test Plan
Test plan holds the complete information like the scope of Software testing,
milestone, test suites and test cases. Once you have created a Test Project,
next step is to create Test plan.
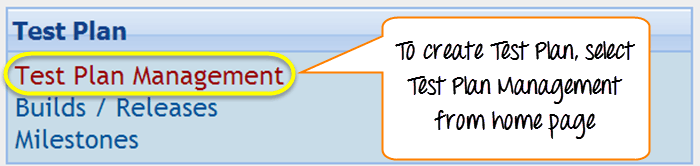
Step 1: From the home-page, click on Test Plan Management from home-page
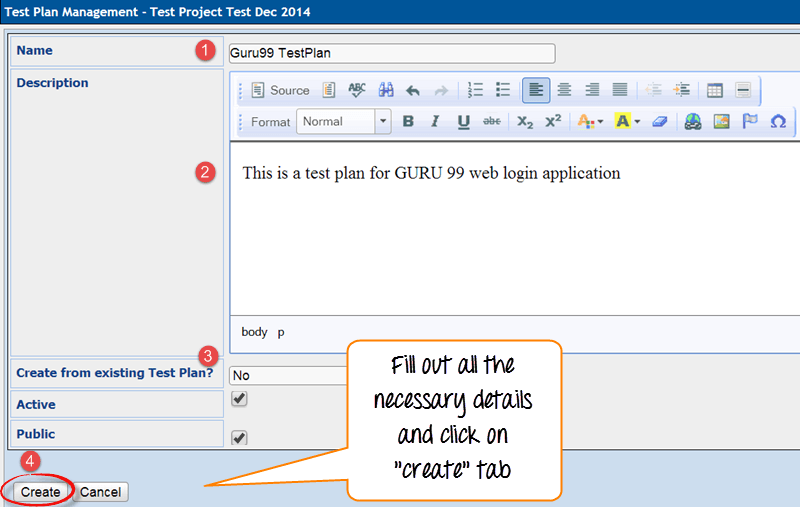
Step 2: It will open another page, at the bottom of the page click on a tab “Create”
Step 3: Fill out all the necessary information like name,
description, create from existing test plan, etc.
in the open window, and click on “create tab”
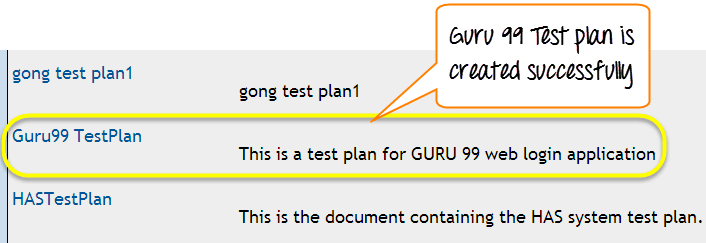
Step 4: Guru 99 Test Plan is created successfully
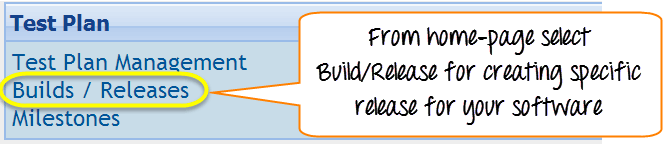
4. Build Creation
A build is a specific release of a software
Step 1: Click on Builds/Releases under Test Plan from the home page
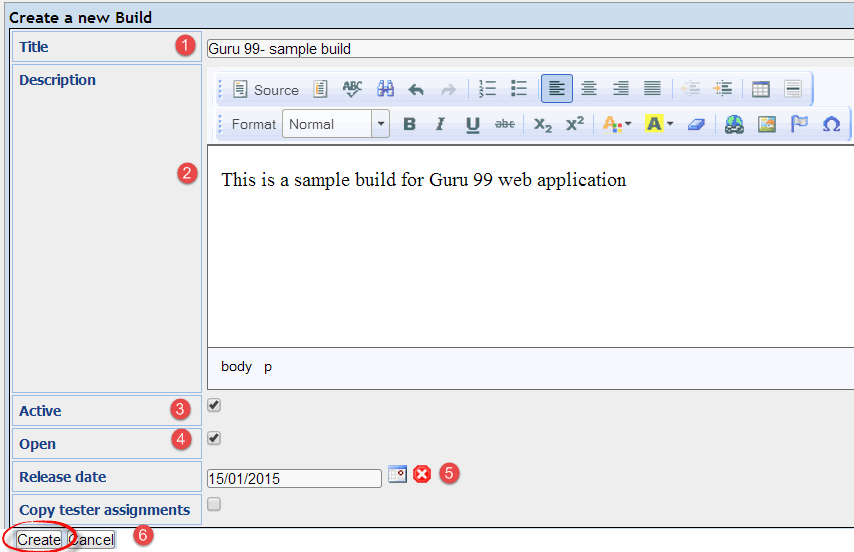
Step 2: In the next window, fill all necessary details for a software release and click on create to save your release
Enter the title name
Enter the description about the software release
Mark the check-box for status- Active
Mark the check-box for status- Open
Choose the date of release
Click on create a button
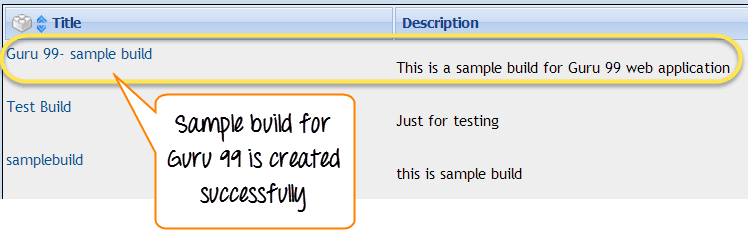
Once you have a release the software it will appear like this
5. Creating Testsuite
Test suite is a collection of test cases which may be testing or validating the same component. Following steps will explain how to create test suite for your project.
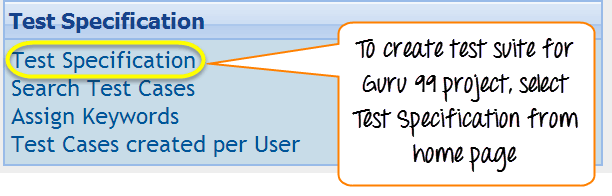
Step 1: Click on test specification option from the home page.
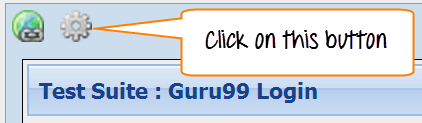
Step 2: On the right-hand side of the panel, click on the setting icon. It will display a series of test operation.
Step 3: Click on the “create” tab for the test suite

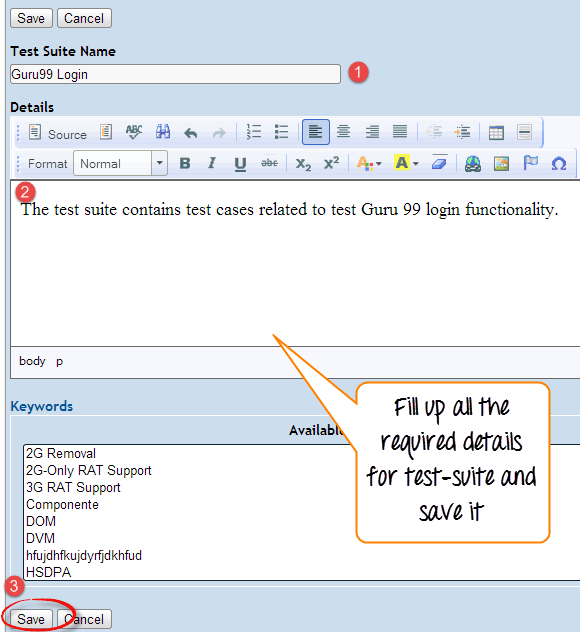
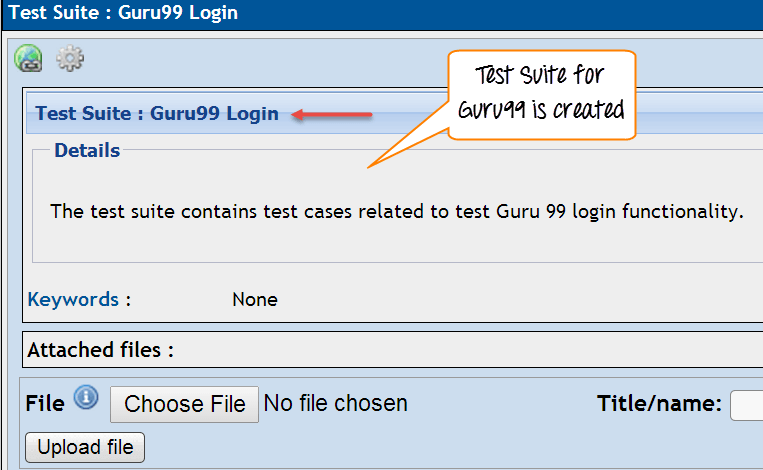
Step 4: Fill-up all the details for test-suite and click on save it tab.
Enter the test suite name
Enter the details about your test suite
Click on save button to save the details of test-suite
You can see the test suite for Guru 99 is created
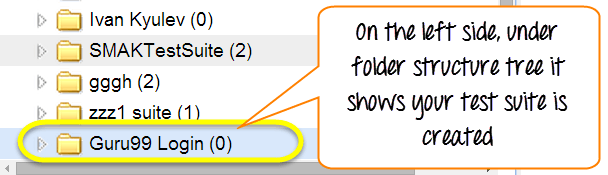
Your test suite appears on the left side of the panel under folder structure tree
6. Creating a Testcase
Testcase holds a sequence of test steps to test a specific scenario with an expected result. Below steps will explain how to create a test-case along with test steps.
Step 1: Click on the test suite folder on the left side of the panel under a folder tree structure
Step 2: Click on the setting icon in the right side panel. List of test case operations will be displayed on the right side panel
Step 3: New window will open, to create test cases click on create a button in test-case operations

Step 4: Enter the details in the test case specification page
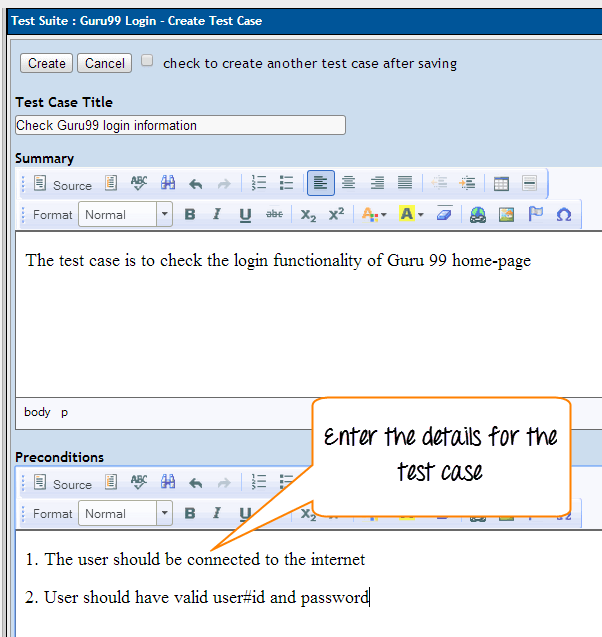
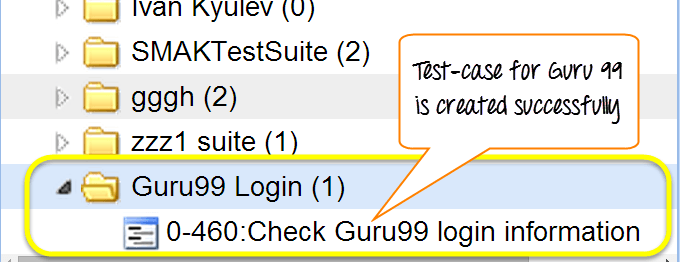
Step 5: After entering the details, click on “create” button to save the details. The test-case for Guru99 is created successfully
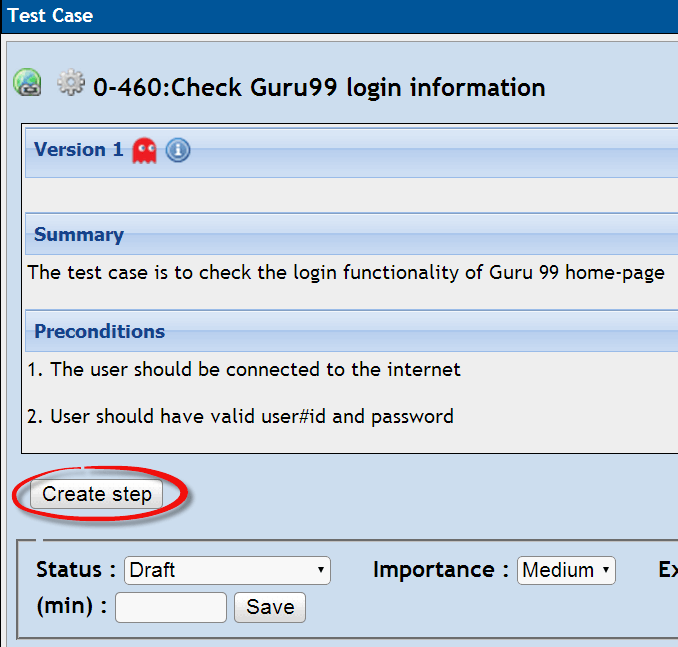
Step 6: Click on test-case from the folder, as shown above, it will open a window. Click on “create steps” button in a test case. It will open a test case step editor
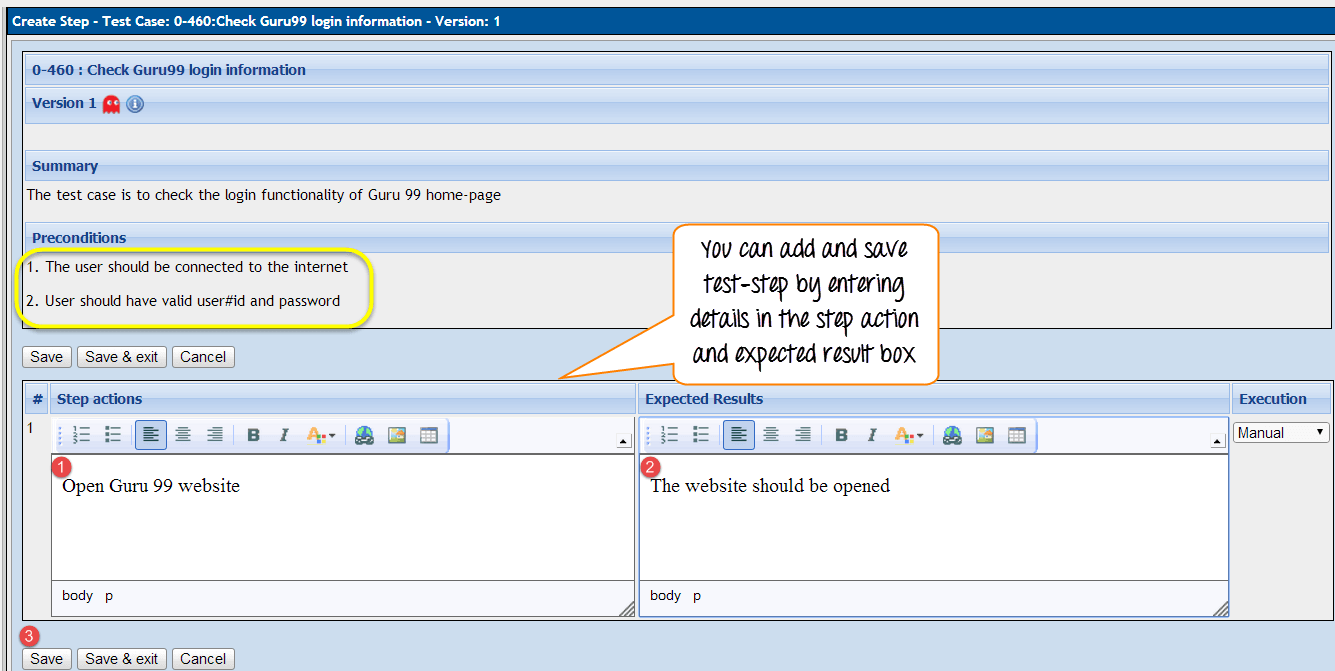
Step 7) It will open another window on the same page, in that window you have to enter the following details
Enter the step-action for your test case
Enter the details about the step action
Click save it and add another step action OR click save and exit tab if there is no more test step to add
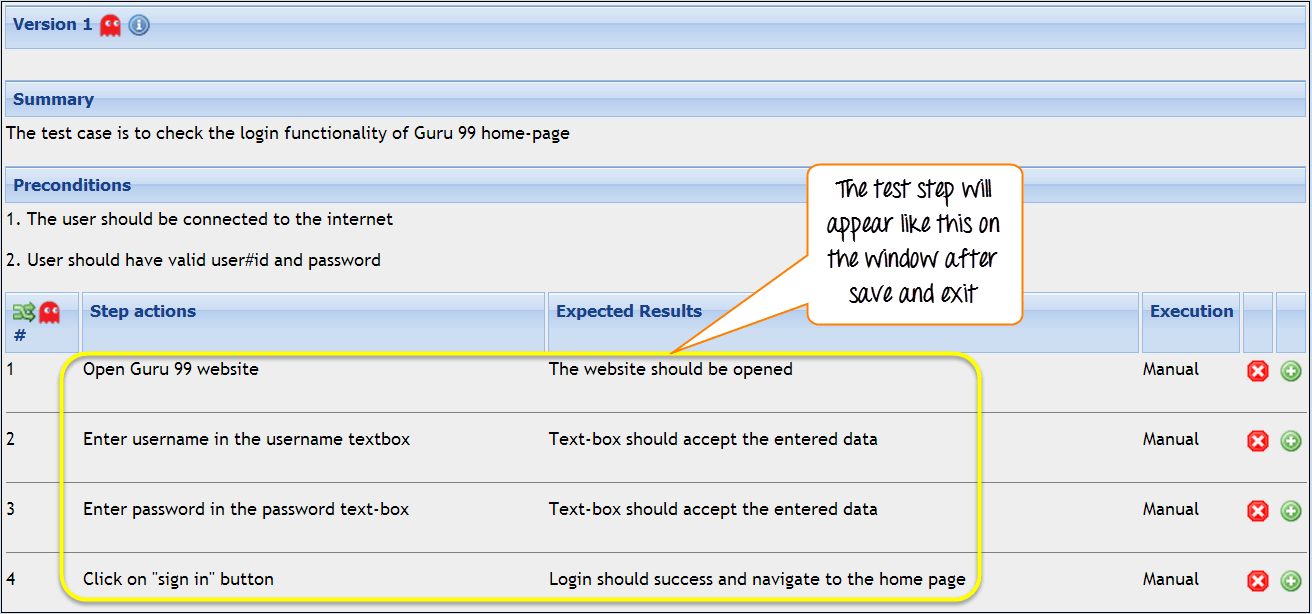
Step 8) Once you save and exit the test step, it will appear like this
7. Assigning test case to test plan
For test case to get executed, it should be assigned to test plan. Here we will see how we can assign a test-case to test plan.
Step 1) Click on the setting icon on the test panel. It will show the list of operations.
Step 2) Click on “Add to Test Plans”

Step 3) New window will open, search your project “Guru99”
Mark the checkbox against your test plan
Click on add button
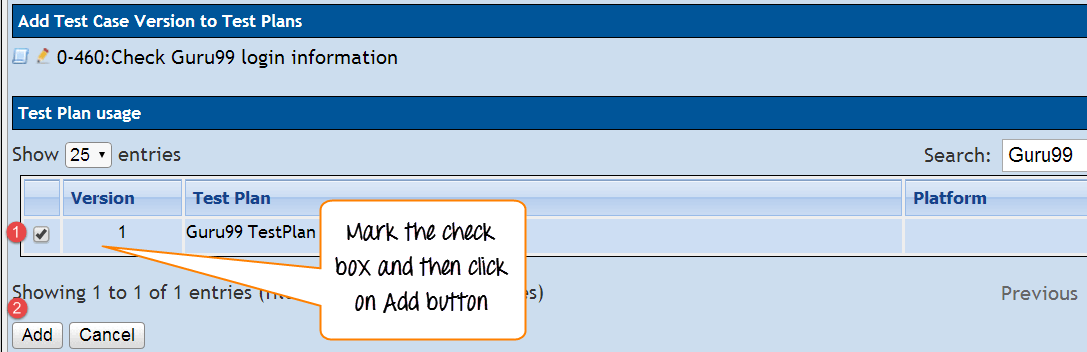
This will add your test case to your Test Plan.
8. Creating Users and Assigning Roles in TestLink
Testlink provides User management and authorization features.
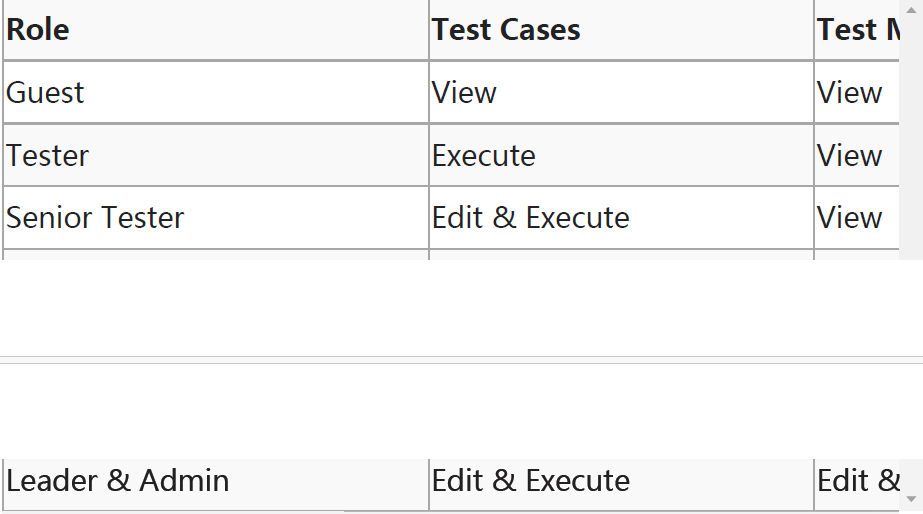
Below is list of default roles in Testlink and their rights –
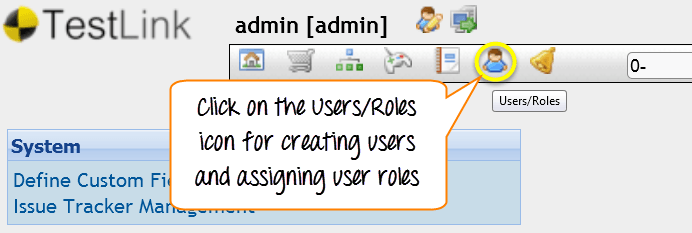
Step 1: From the Testlinks home-page, click on users/roles icon from the navigation bar
Step 2: Click Create
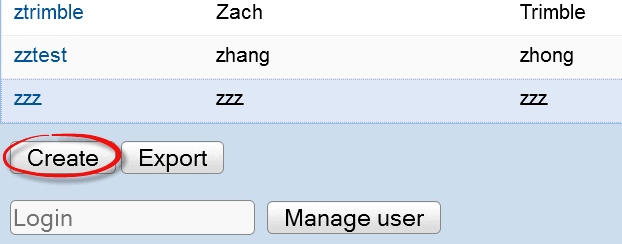
Step 3: Fill out all the users details and click the “Save” button
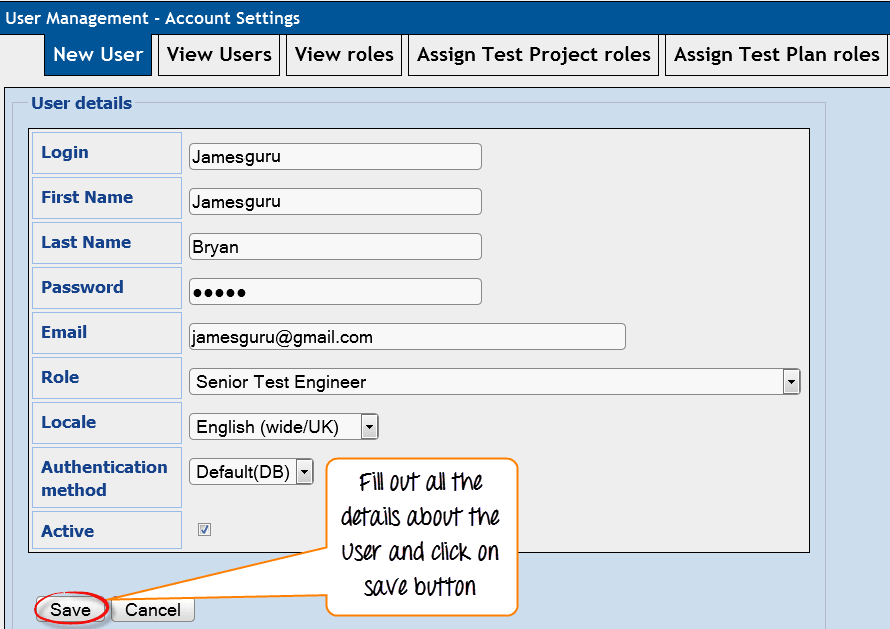
Here in the list, we can see the users have been created

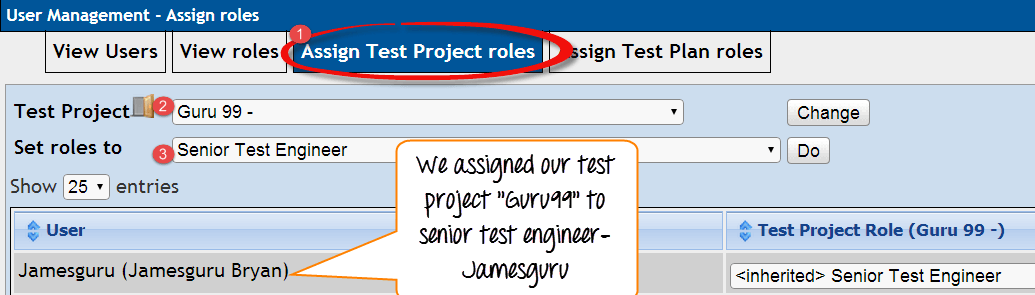
Step 4: Allotting test project role to the user,
Click on “Assign Test Project Roles” tab
Choose the project name
Select the user role from the drop down
9. Writing Requirements:
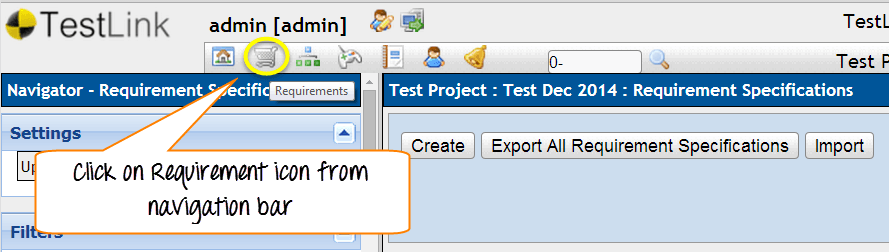
Step 1: From the navigation bar select the “Requirements Link”, it opens the Requirement page.
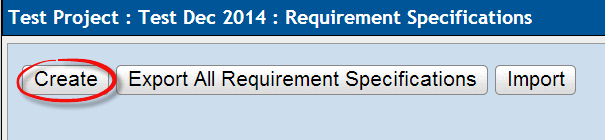
Step 2: From the requirement page, on the right side of the panel click on “create” button
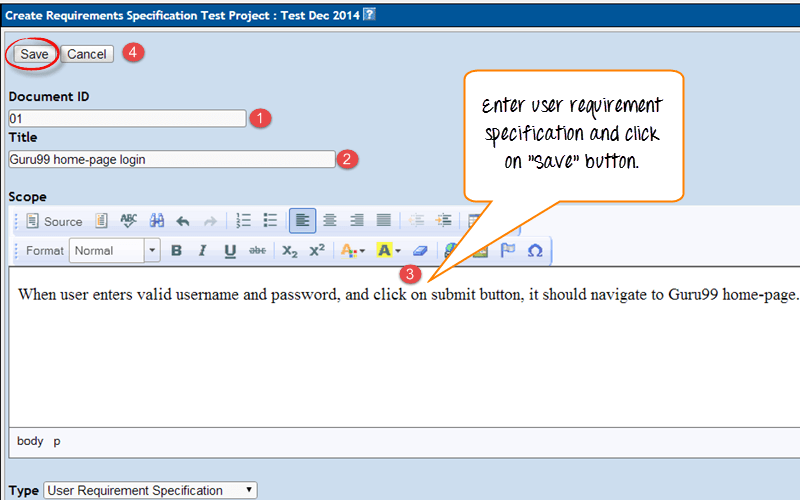
Step 3: A new window will open, enter all the details like
Document ID
Title name
Requirement Description
And Click “Save” button
For the type, you can choose the option from the drop-down- here we chose “User Requirement Specification”
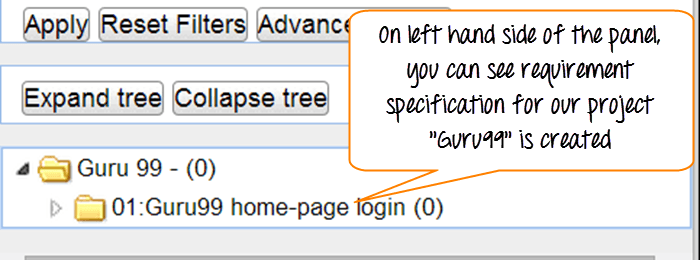
Step 4: It should create Requirement specification and displayed on the left side panel under the project “Guru99”.
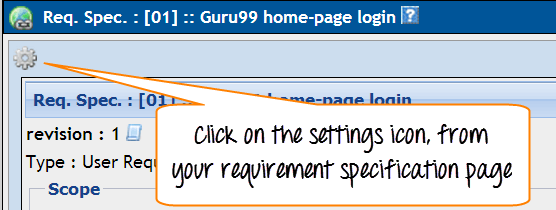
Step 5: Select the setting button from requirements specification home-page. It will open another window.
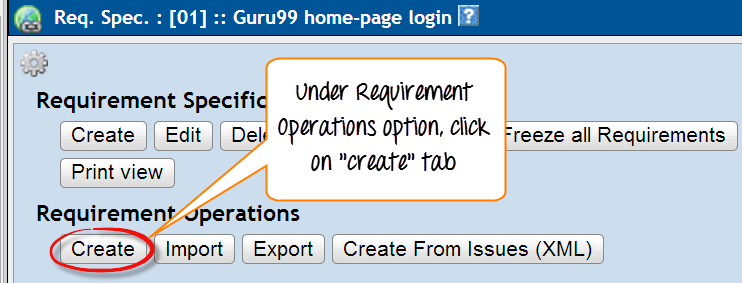
Step 6: Click “Create” tab under Requirement Operations.
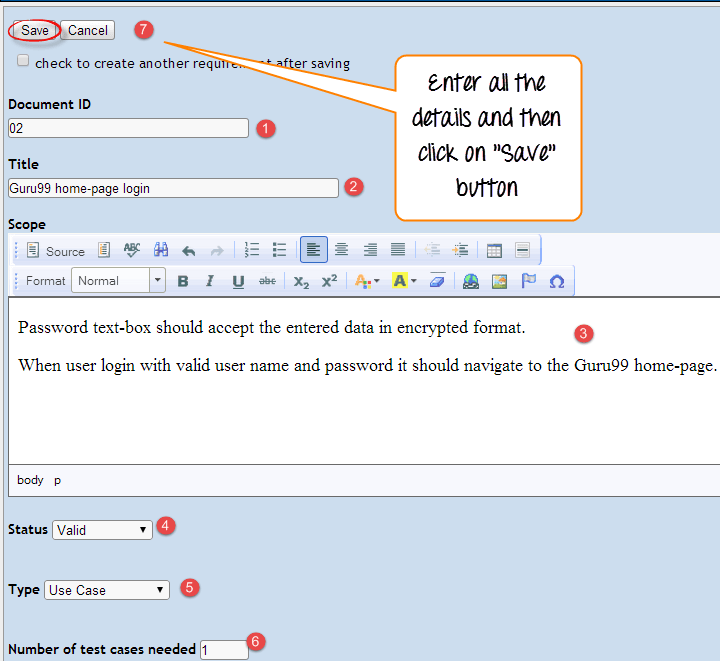
Step 7: Fill out all the specified details and click the “Save” button
Enter the document ID
Enter the title name
Enter the description
Enter the status-whether it’s in draft, rework, review, not testable, etc. Here we chose valid
Enter the type – user interface, non-functional, informational, feature, etc. Here we chose use case
Enter the number of test cases needed
Enter “Save” button at the end
Note: To add more requirements you can mark the check-box and click save button
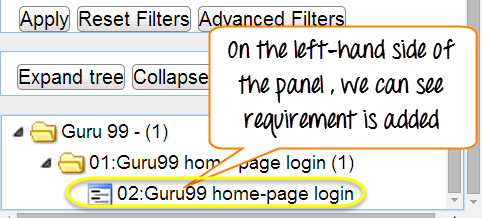
On the left side of the panel, we can see that the requirement is added.
10. Assigning requirement to test-cases
In Testlink, Requirement can be connected to test cases. It is a very crucial feature in order to track test coverage based on requirements. In test reports, you can verify which requirements are not covered and act on them to apend in test suites for maximum test coverage
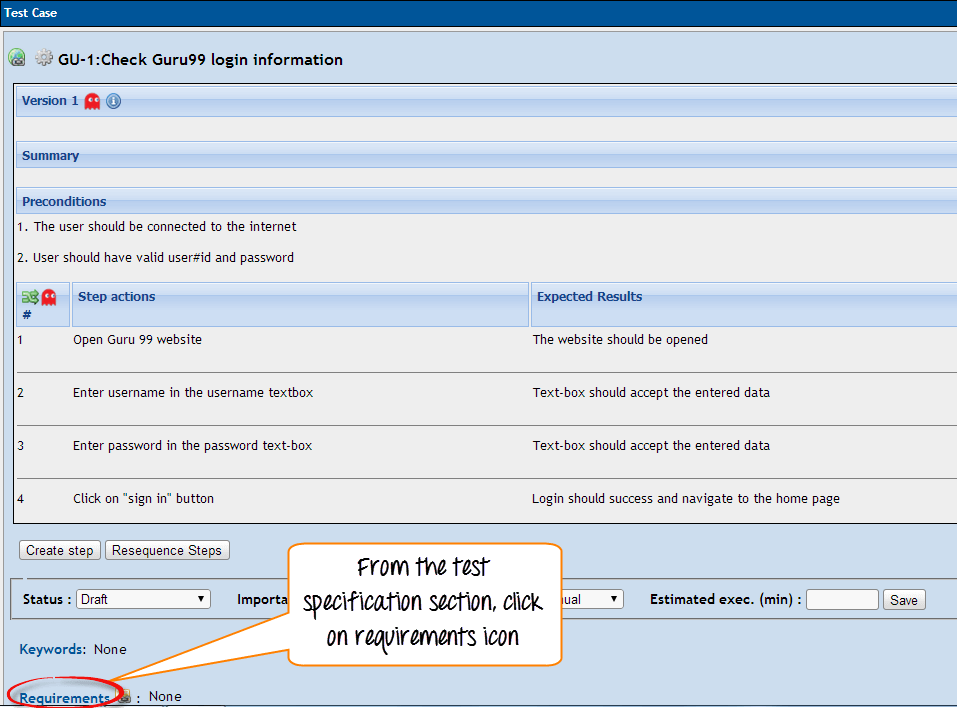
Step 1: From the test specification section open any single test case and click on requirement icon
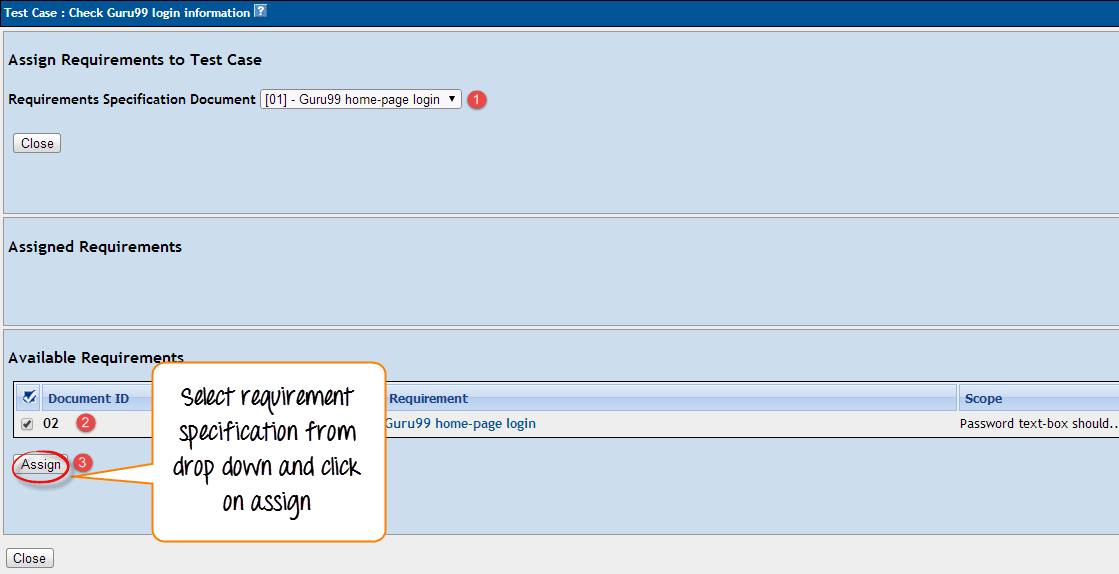
Step 2: To assign requirements specification to test case you have to follow the following steps
Scroll the drop down box to select the requirements specification
Mark the requirement checkbox
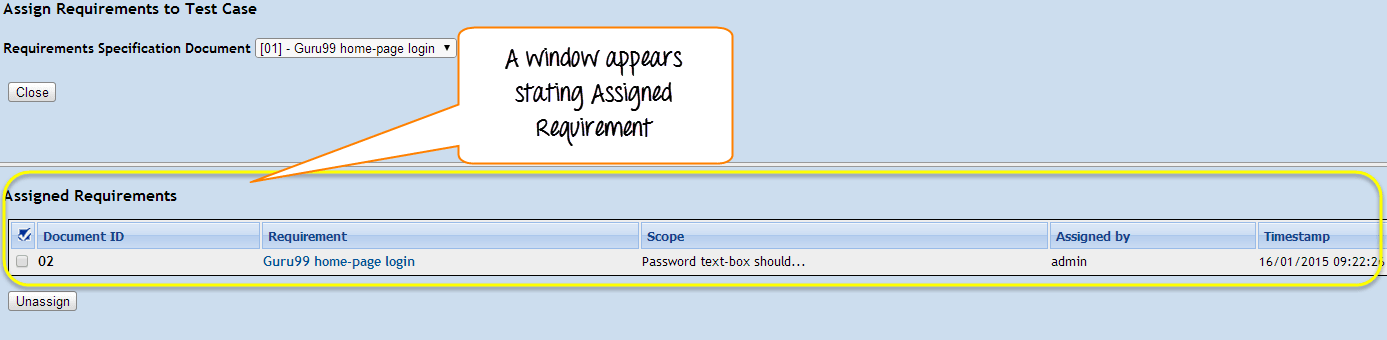
Click on “assign” tab
 After clicking on “assign” tab, a window will appear stating “Assigned Requirement.”
11. Executing a test case
In TestLink, we can run a test case and change execution status of a test case. Status of a test-case can be set to “blocked” “Passed”, or “failed”. Initially, it will be in “not run” status but once you have updated it, it cannot be altered to “not run” status again.
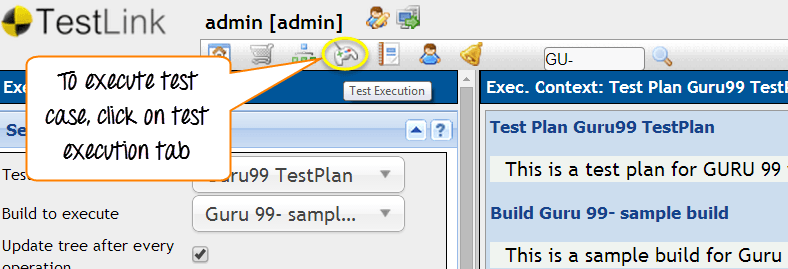
Step 1: From the navigation bar click on the “Test Execution” link. It will direct you to the Test Execution Panel.
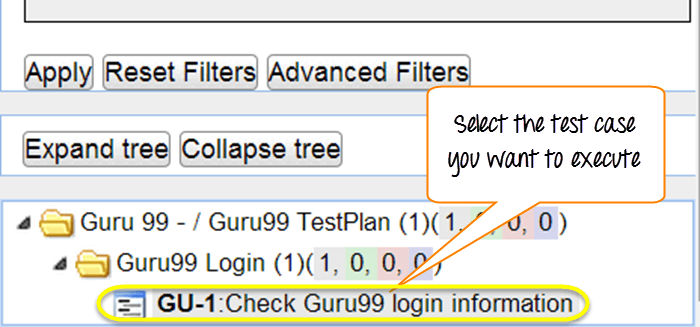
Step 2: Pick the Test case you want to run from the left side panel
Step 3: Once you have selected the test cases, it will open a window.
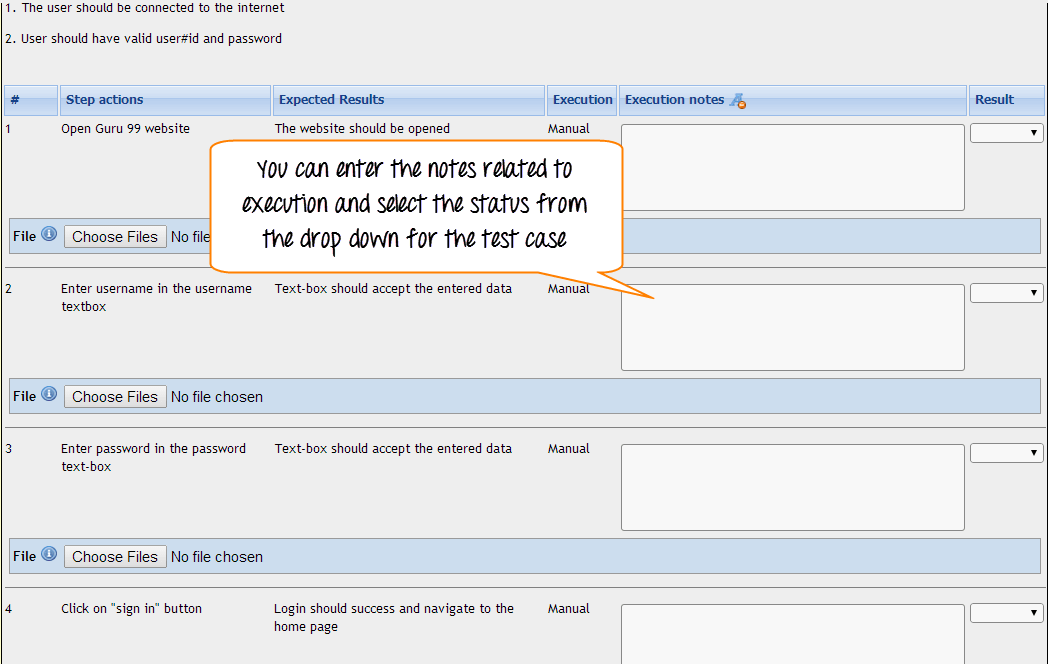
Step 4: Follow the following steps Enter the notes related to test case executed Select its status
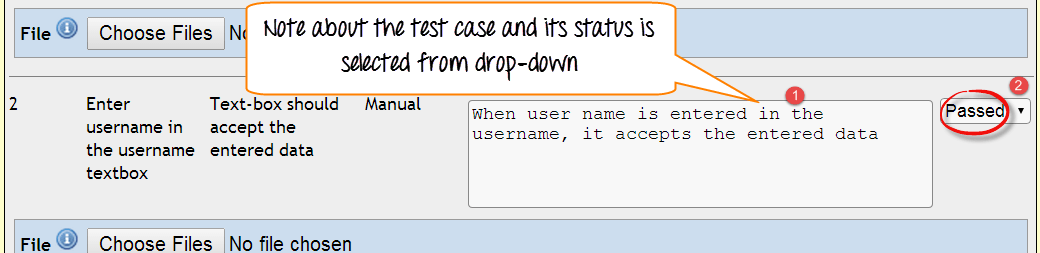
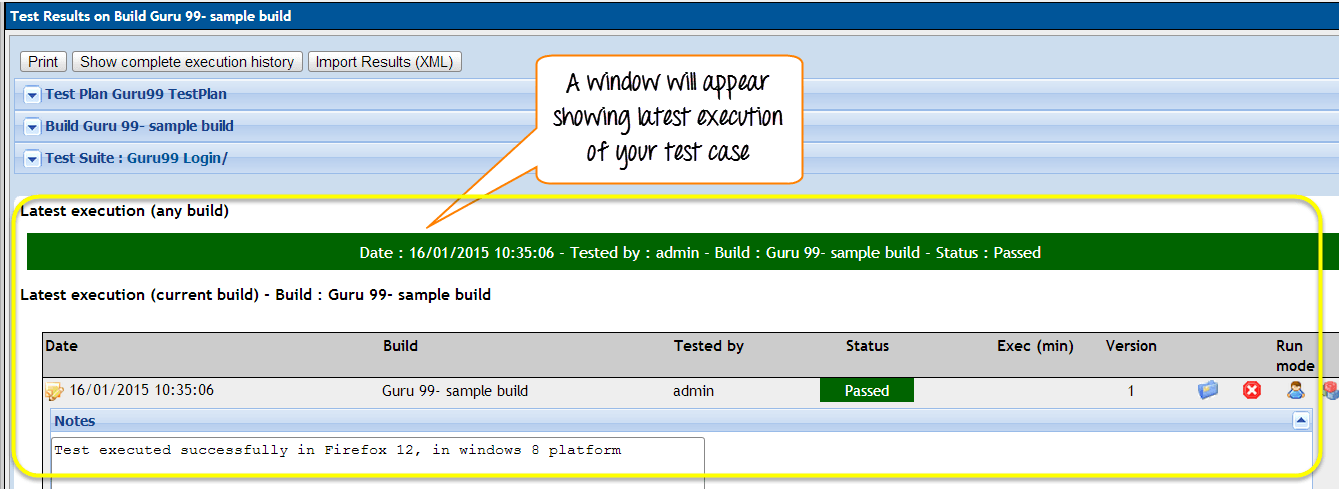
Step 5: On the same page, you have to fill similar detail about the execution of test-case. Fill the details, select the status and then click on “save execution”.
12. Generating Test Reports
Test link supports various test report formats like
HTML
MS Word
MS Excel
OpenOffice Writer
OpenOffice Calc
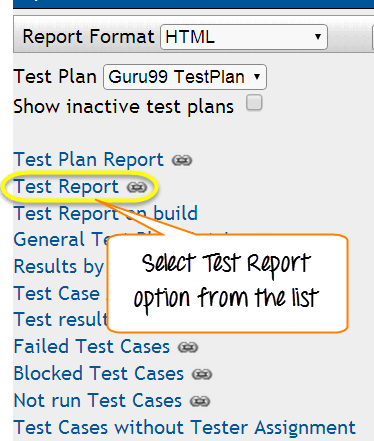
Step 1: From the navigation bar, click on Test Reports option

Step 2: From the left side panel, select “Test Report” link
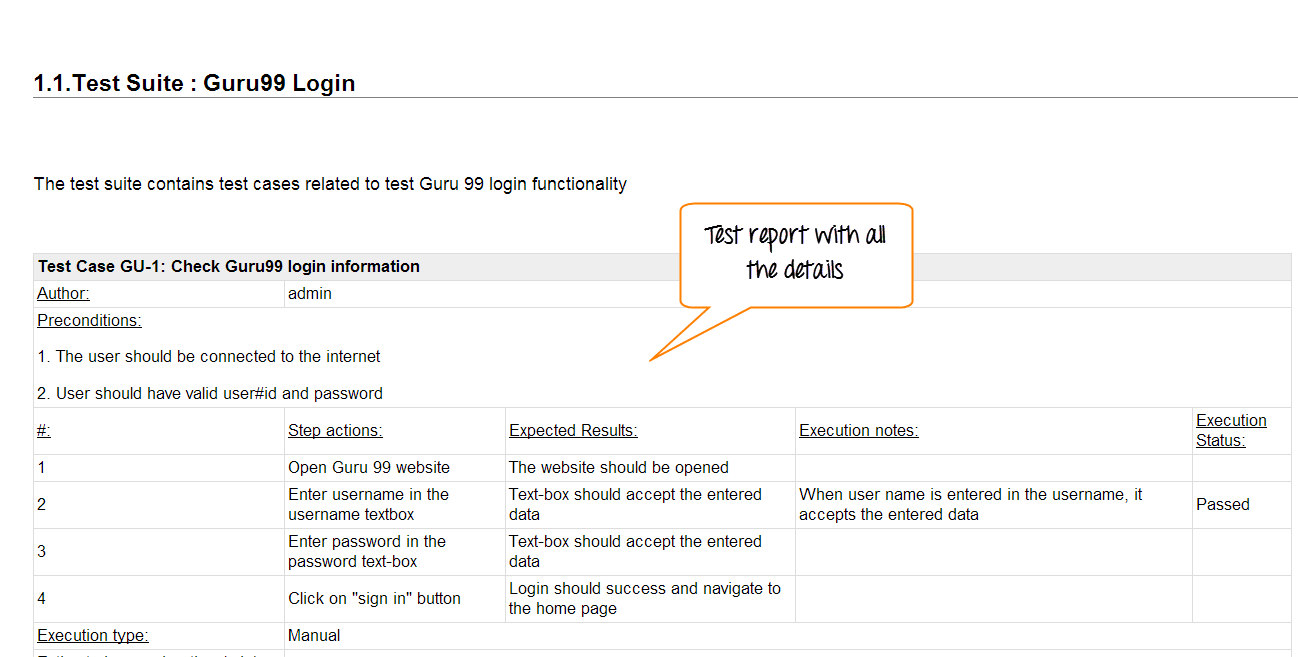
Step 3: To generate a report follow the following steps Mark and unmark the option you want to highlight in your test report click on your project folder
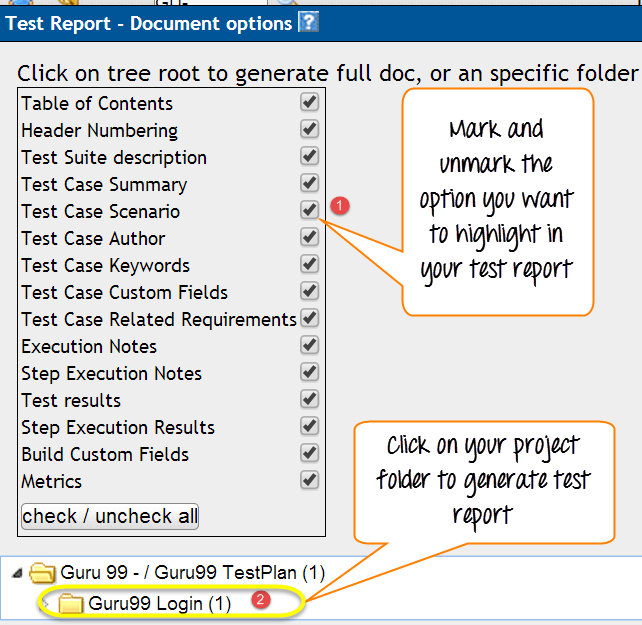
The test report will look like this
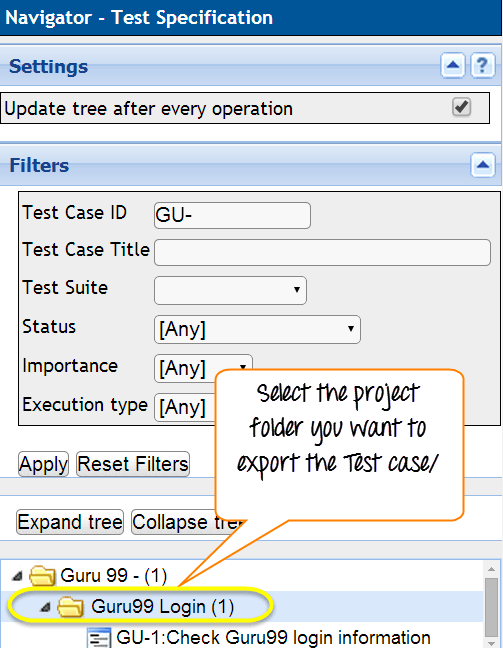
13. Export Test case/ Test Suite
Testlink provides the features to export test projects/test suites in your Testlink and then you can import them into another Testlink project on different server or system. In order to do that you have to follow the following step
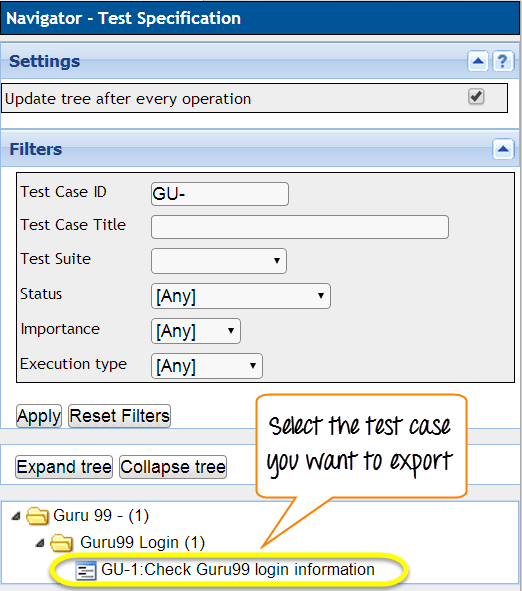
Step 1: Choose the test case you want to export in the Test specification page
Step 2: Now on the right-hand side of the panel click on the setting icon, it will display all the operations that can be performed on the test case.
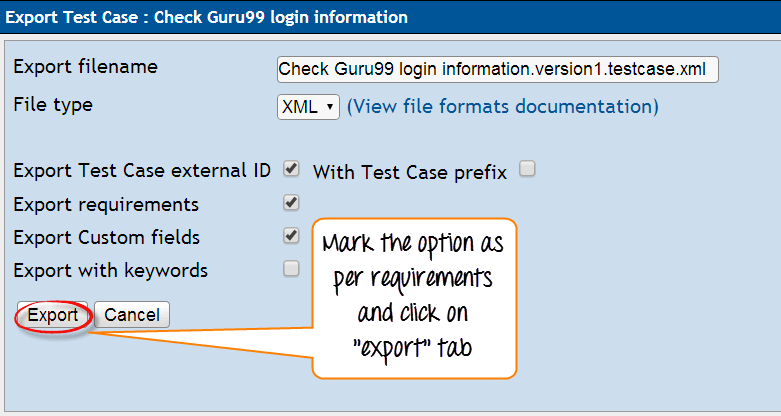
Step 3: Click the “export” button

Step 4: It will open another window, mark the option as per requirement and click on the export tab
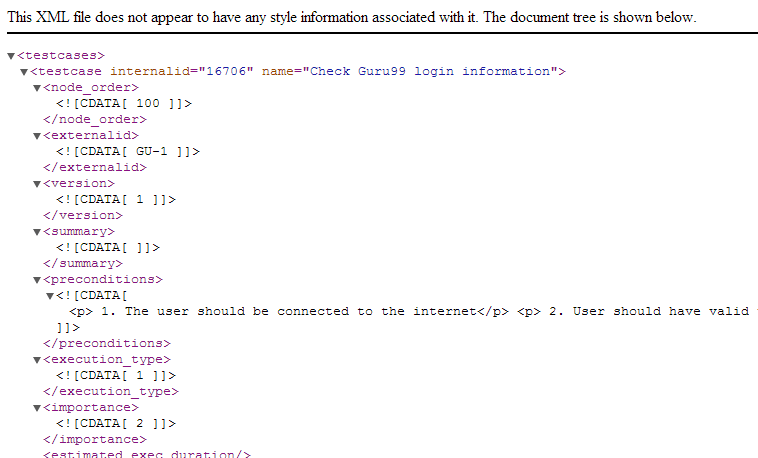
14. Following XML is generated
15. Importing Test case/ Test suite
Step 1: Select the Test suite folder inside which you want to import the test case
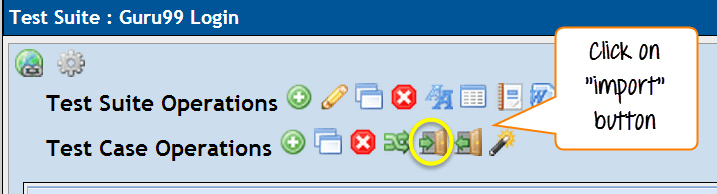
Step 2: Click on the setting icon on the right-hand-side of the panel, it will display all the operations that can be executed on the test suite/test case
Step 3: Click on the import button in the test case operations list as
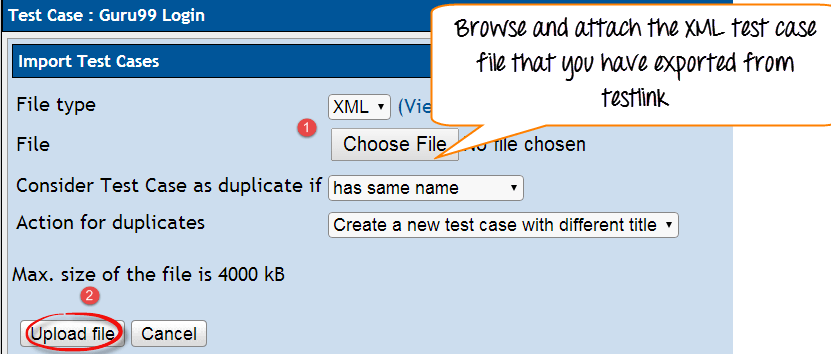
Step 4: Browse and attach the XML test case file that you have exported from test link and click on upload button. Use the browse option to attach the XML test case file that you have exported from testlink Click on upload file
When you upload a file, it will open window stating import test cases
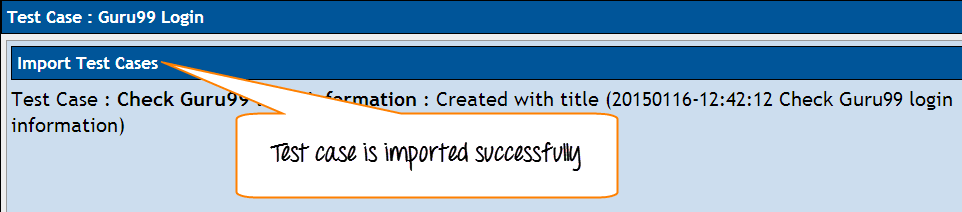
Step 5: Test case will be uploaded and displayed on the right-hand side of the panel

Summary:
In this tutorial, we have covered various aspects of TestLink- like how you can use Testlink-as a test management. It explains you step by step how to manage test plan for your project, how to create a user and assign them their roles accordingly or even how to import or export test cases to your project. Other useful features like generating reports, defining requirement, etc. are also demonstrated well in this tutorial.
Related commands
- Restart Apache2 service: `sudo systemctl restart apache2.service`
- Stop Apache2 service: `sudo systemctl stop apache2.service`
- Check Apache2 service status: `sudo systemctl status apache2.service`
- Start MySQL service: `sudo service mysql start`
- Stop MySQL service: `sudo service mysql stop`
- Check MySQL service status: `sudo service mysql status`
- Restart MySQL service: `sudo service mysql restart `
- Root user password is Fleximg!123 and testlink user password is Fleximg!123